
How to Make Comics: Ideas, Activities, and Resources for Learning and Making
Try your hand at making a short comic with this step-by-step guide for teachers and students.
Arlette Hernandez, Larissa Raphael
Sep 30, 2021
This is the fourth and final article in our How to Make Comics series for teachers, families, and comics-lovers who are interested in exploring the medium.
Over the course of three articles, writer and comics scholar Chris Gavaler helped us understand what comics are, the potential of the art form, and some of the many approaches to making comics. Still, for many of us, starting with a blank sheet of paper can be daunting—even when we know the basic ideas for filling in the page.
To conclude the How to Make Comics series, we wanted to offer a step-by-step approach you can follow in order to transform that blank sheet into a visual story that’s all your own.
This sequence of activities is based on a series of lessons Larissa led several years ago with a group of high school English language learners, in which the students used the comics form to tell the story of their first day in New York. There are many ways to approach making comics, as Chris outlined in the third article in this series, but for our purposes, we are using the story-first approach, since it can easily tie into an English language arts, history, or English as a new language curriculum.
We’ll continue using examples from MoMA’s collection to spark and demonstrate ideas because, as Chris discussed earlier, many works in MoMA’s collection are in the comics form—that is, they tell stories by pairing images.
As you go through this article and begin making your own works, remember that rules and conventions can be broken. The most important thing is experimenting and telling stories in a way that works for you!
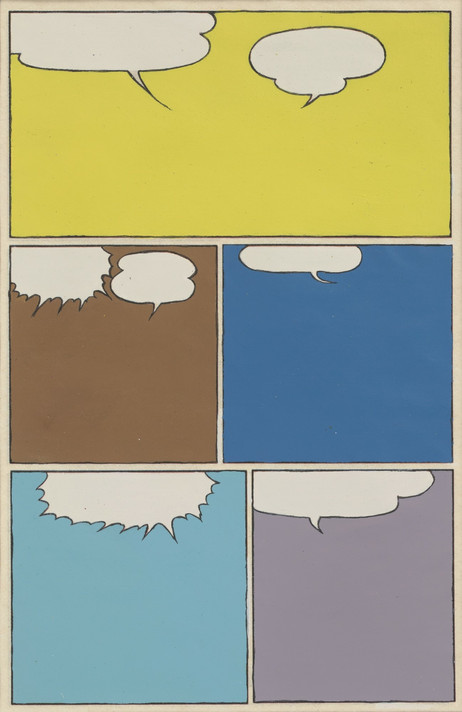
Rivane Neuenschwander. Zé Carioca no. 4, A Volta de Zé Carioca (1960). Edição Histórica, Ed. Abril. 2004
While this guide is written with students and teachers in mind, many of these activities and ideas can be adapted for people of all ages. Our hope is that this article might inspire your creativity and self-expression.
And one final note: even though this guide is written sequentially, you can change, adapt, and adjust your story as you go through the process. No mark or idea needs to be final until you decide it is. Throughout the process, ask your friends and family for feedback. Try out different elements to see how your story changes. Even the most experienced comic artists and authors go through multiple drafts and versions before arriving at a final draft.
Step 1: Identify Your Story
The first question you might want to ask is, what is my comic going to be about? When working with students or beginning your comic, telling a personal story can be the easiest way to speak in a genuine voice and connect with readers. Your personal stories could be about large and important events in your life or family stories passed down through generations. But they can also recount small moments in your day. What if you told a story about going to the grocery store, but focused on the way your emotions shifted during the trip?
Jacob Lawrence tells the story of the Great Migration, a period following World War I when an exodus of African Americans moved from the rural South to northern cities. Lawrence’s parents and his other relatives made up one of many families who migrated north.
On Kawara, on the other hand, captured simple details in his life in a series called I Got Up…. Every day, the artist sent two picture postcards to friends or colleagues, writing on the back of each card a message that began with “I got up,” followed by the time he arose from bed.
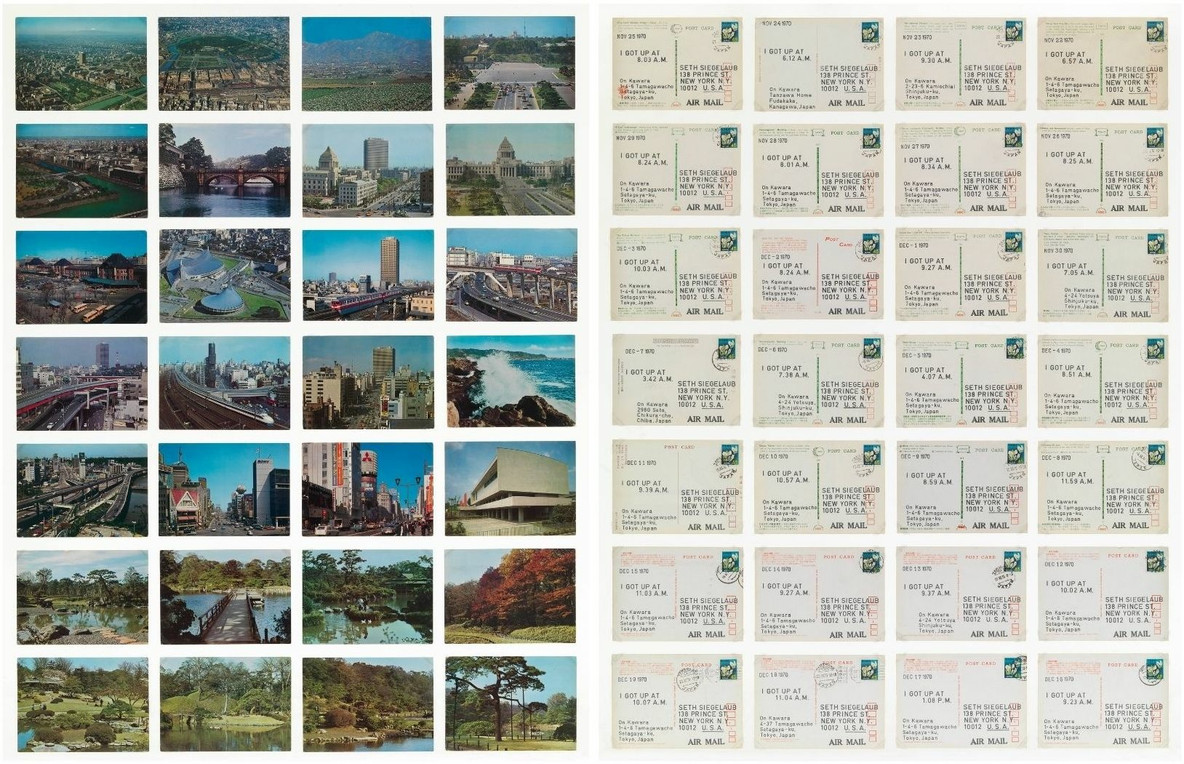
Recto and verso of works in On Kawara's I Got Up..., 1970
Begin by sequencing your story. What happened first, second, and so on? How many scenes are in your story? What do you see as the beginning, middle, and end of your narrative? Breaking a story down into its most essential parts will help you determine how many panels you might need in your comic. For first-time comics makers, we recommend three to six panels (this number will still allow for a rich story, with a clear beginning, middle, and end, that’s not too overwhelming).
Once you know the basic parts of your story and the amount of panels you’ll use, start mapping your comic’s structure while considering what parts of your story feel most exciting, impactful, or emotional. How can you bring a reader’s attention to these parts in your story through your comic’s layout? Think about the shapes, sizes, and framing of each panel. Does every panel look the same, or is one more prominent than another? How do they work together?
For example, larger panels, like the fourth and fifth panels in this excerpt from a comic strip by Lyonel Feininger, help convey the excitement felt by the characters when they catch a big fish. At the same time, the long shape of the last panel at the bottom helps create movement. What if you created a panel with an unusual shape, like a star or cloud? How might that shape convey mood and emotion? Learn more about layout in this article from the series.
If you are short on time or feel like you or your students might want some extra support, you can use these pre-made templates.
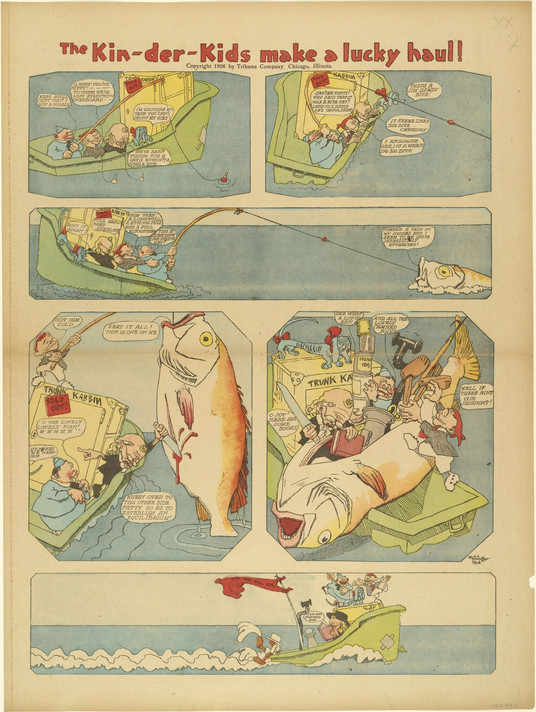
Lyonel Feininger. The Kin-der-Kids Make a Lucky Haul! from The Chicago Sunday Tribune. June 10, 1906
Step 2: Sketch Out the Characters
Once you have the outline for your story, you can start identifying the main characters and what they will look like. Try asking students to describe one or more defining features that are unique to their chosen character. This can be an outfit, a hairstyle, facial features, or even a recurrent motif. Your character can be as detailed or simple as you like, everything from a well-rendered avatar that resembles a real person to a stick figure in a blue skirt. The key here is to make sure that the character is rendered consistently throughout the comic; that way they will be recognizable, allowing the reader to easily follow the story.
In Frida Kahlo’s many self-portraits, she represents herself in different haircuts, outfits, and settings. But she’s always easy to recognize through her well-defined facial features, like her eyebrows.
Once you’ve identified your character and how you will represent them, look at your story and consider what emotions they might experience. How can you convey these emotions through gesture or expression? Practice drawing different emotions by adjusting the shape and position of your character’s mouth, eyes, and eyebrows. For example, if your character is excited, try drawing them with a big smile and arched eyebrows.
If your story has a lot of movement, you can also consider gestures for your character that will fit the story—running, walking, sitting, crouching, etc. Maybe your character can convey excitement by jumping up and down with outstretched arms. Practice drawing these movements, gestures, and expressions until you feel they support the events in your story.
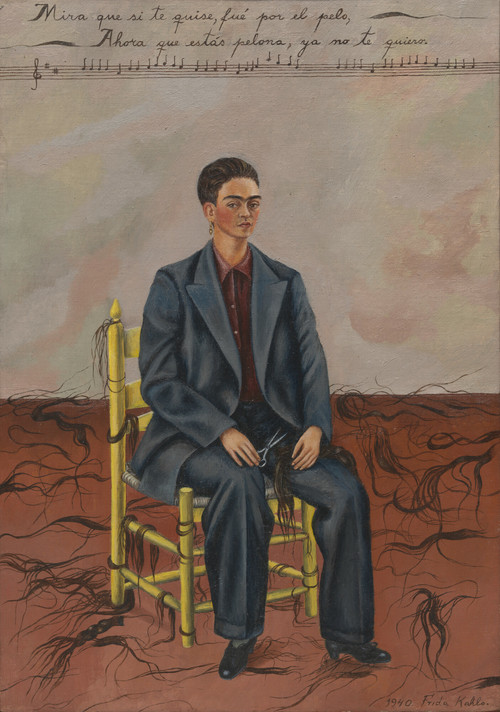
Frida Kahlo. Self-Portrait with Cropped Hair. 1940
Step 3: Establish the Setting
In most stories, setting is closely connected to events and characters. Establishing a clear location for each panel can move your story forward and offer a lot of nonverbal information. Don’t worry about making your background comprehensive or realistic—a simple image or a symbolic landmark can offer lots of information with minimal details. For example, adding a chair to your setting can represent the interior of a home or classroom, while a tree can let readers know that the characters are outside. A structure like the Eiffel Tower can represent Paris. Just like you did with the characters, practice drawing your settings until they fit into your story and give readers a sense of place.
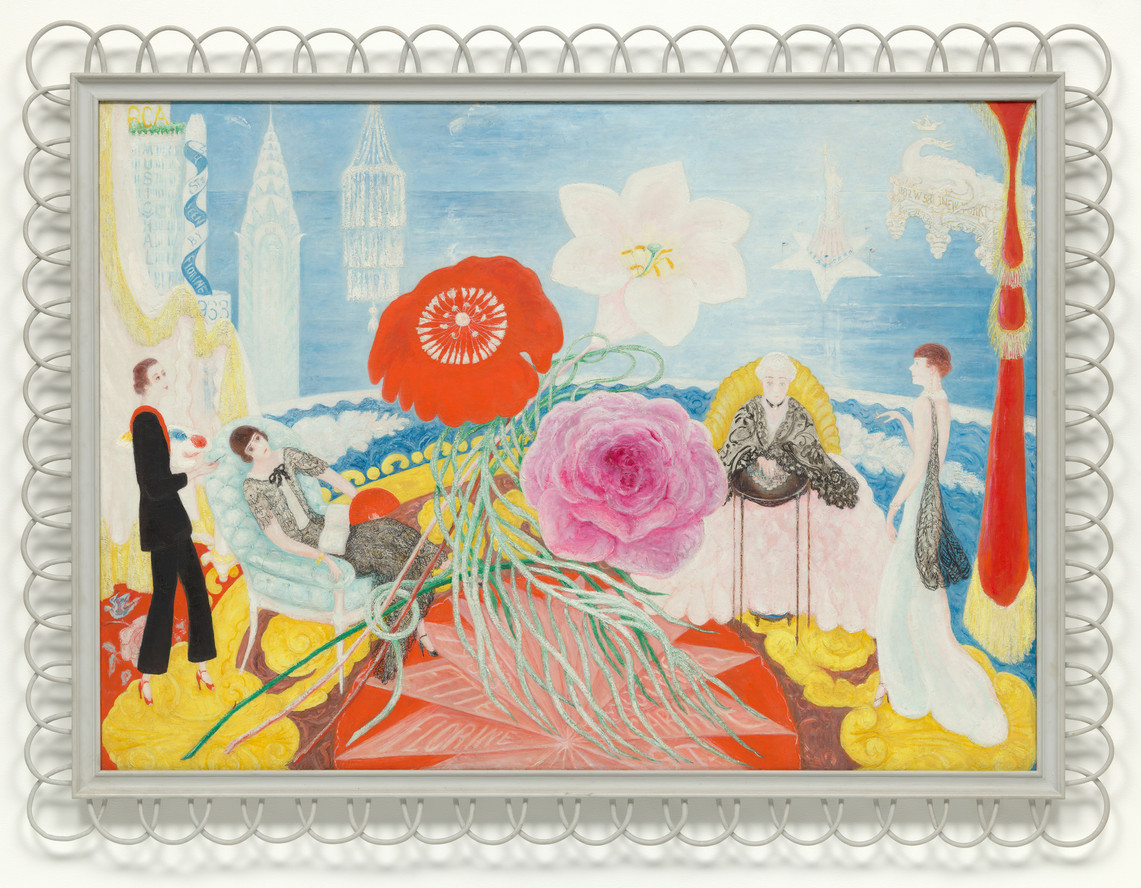
Florine Stettheimer. Family Portrait, II. 1933
In Family Portrait II, Florine Stettheimer indicates that she and her family are located in New York City by adding stylized representations of recognizable structures, such as the Chrysler Building and Statue of Liberty.
Step 4: Incorporate Words and Sounds
Now that you have a story, fleshed-out characters, and setting, you can decide what parts of the story need to be conveyed through text. You might find that your comic doesn’t require any text, and if so, that’s great! Speech or thought bubbles can help clarify and expand the meanings you already established through images. They can also help you skip details that are important to the story, but might not make for interesting pictures.
When adding thought and speech bubbles (as well as narration boxes that offer information from the perspective of someone outside of the story), experiment with the shapes, size, color, and outlines of these containers. What if a character’s speech is contained within a square box, but their thoughts are placed inside triangles? What if speech and thought look the same and appear as free-floating words in your panels?
You should also consider the appearance of the actual words. As you draft your text, play around with the typeface’s weight (is it bold or thin?), color, spacing, size, and font. How can these qualities help emphasize your words or convey significance? And how can you use words to represent sound? For example, “KRAKOW” can evoke thunder in a stormy scene.
Consider Claes Oldenburg’s Boom (folio 11) from Stamped Indelibly, in which the word “boom” is printed multiple times with thin lines and muted colors on a plain background. How do Oldenburg’s stylistic choices affect the way you read the text? How could you evoke different feelings with a bolder font and brighter colors? Play around with different effects for your fonts to achieve maximum effect.
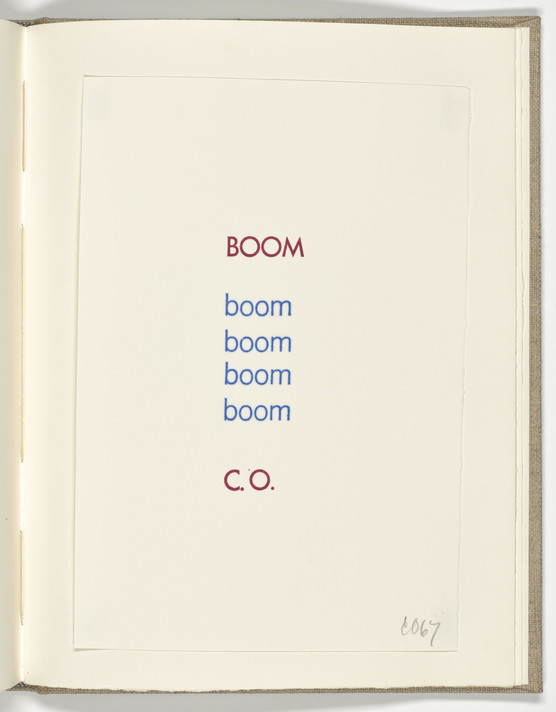
Claes Oldenburg. Boom (folio 11) from Stamped Indelibly. 1967
Step 5: Add Some Color
Using color can significantly impact the effect of your comics. First, think about whether you want to use color in your comic and what color might add to your story. Maybe your comic doesn’t need color and would look stronger in black and white? Sometimes comic book makers choose to work in black and white out of necessity; at other times, it’s an artistic choice. Some find that a black-and-white color scheme helps a story feel more serious or scary.
If you decide to use color, consider which color palette will work best to convey meaning, mood, or sensation? Working with just one color or using a limited palette (one to three colors) can emphasize details and emotions. And depending on the palette—whether it’s warm or cool, contrasting or complementary—it can also affect whether your reader feels comfortable, nervous, or happy. There is no right or wrong decision—it all depends on what your story needs.
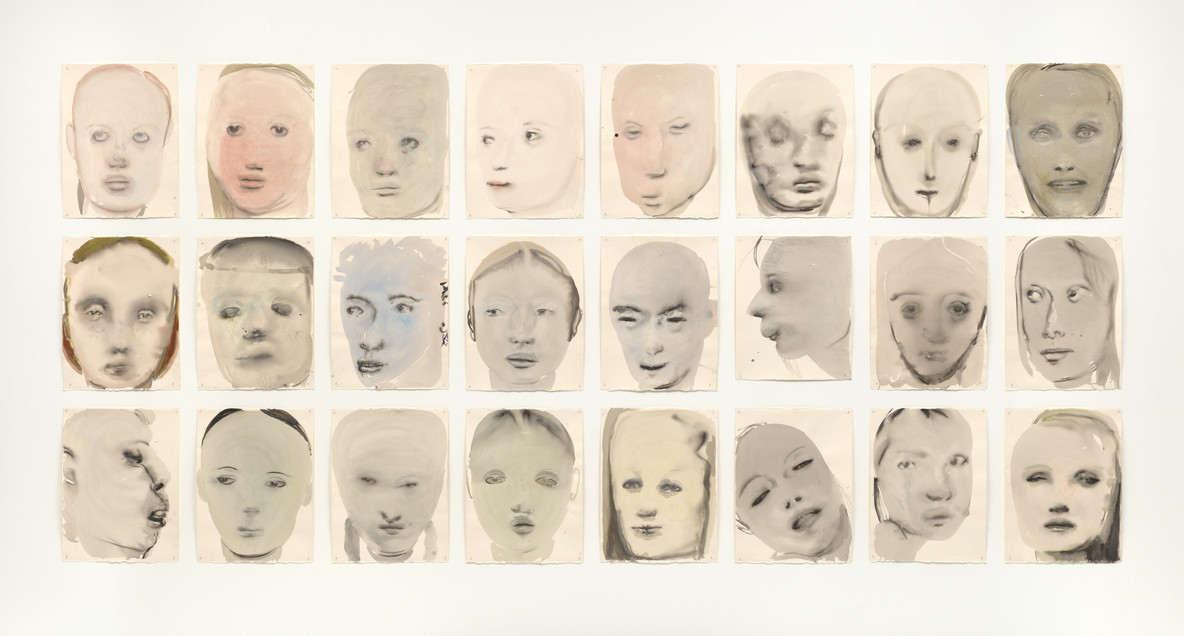
Marlene Dumas. Chlorosis (Love sick). 1994
Marlene Dumas uses thin washes of paint and few colors to evoke an anemic disease marked by a green skin tone, called chlorosis. Chlorosis was once believed to be caused by the intense suffering provoked by unrequited love. The contrast between pink and green hues emphasizes the distressed facial expressions of the subjects, and might even make us feel uncomfortable.
Step 6: Share it!
Whether you’ve been working in pencil, pen, or digitally, you can finalize your comic by deciding how you want it to be read. Most comics are published as books or zines—small booklets created with basic tools like a printer and a stapler. Today, some comics are only published digitally, and are shared with the world through online articles, blogs, and social media.
For example, Allie Brosh’s memoir about depression, Hyperbole and a Half, first began as a webcomic on a blog. Every few weeks, the artist would upload new pages onto her blog, using comics as a way to cope with mental health struggles. While Brosh never imagined her book would end up in print, four years after she started her blog, her illustrations were compiled into a book.
Decide how you’d like your comic to be read. How many people do you want to share it with? Do you want your readers to hold the comic in their hands or experience it on their phone? Maybe your comic takes the form of a series of postcards sent to one person, or as a carousel post on Instagram. You can create your own printed zines or even submit your work to a publication.
A lot of these decisions have to do with the goals you have for your story and your readers. MoMA’s comics series, Drawn to MoMA, is published digitally so people who might not be able to visit the Museum in person can do so virtually, through the eyes of an illustrator.
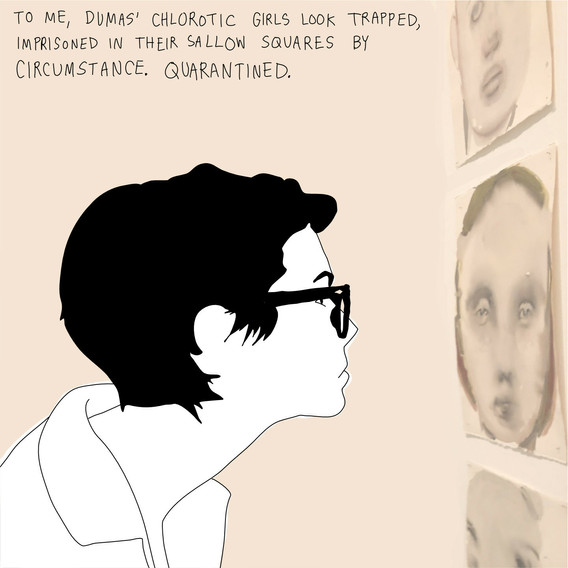
Illustration from Erin Williams’s “Love Sick” for Drawn to MoMA
In the end, the choice is yours—and that’s the best part! Regardless of what you make, who reads it, or how you share it, as long as you enjoy the process and tell a story that feels true to you, your comic is a success.
We can’t wait to see what you made! Share with us at [email protected].
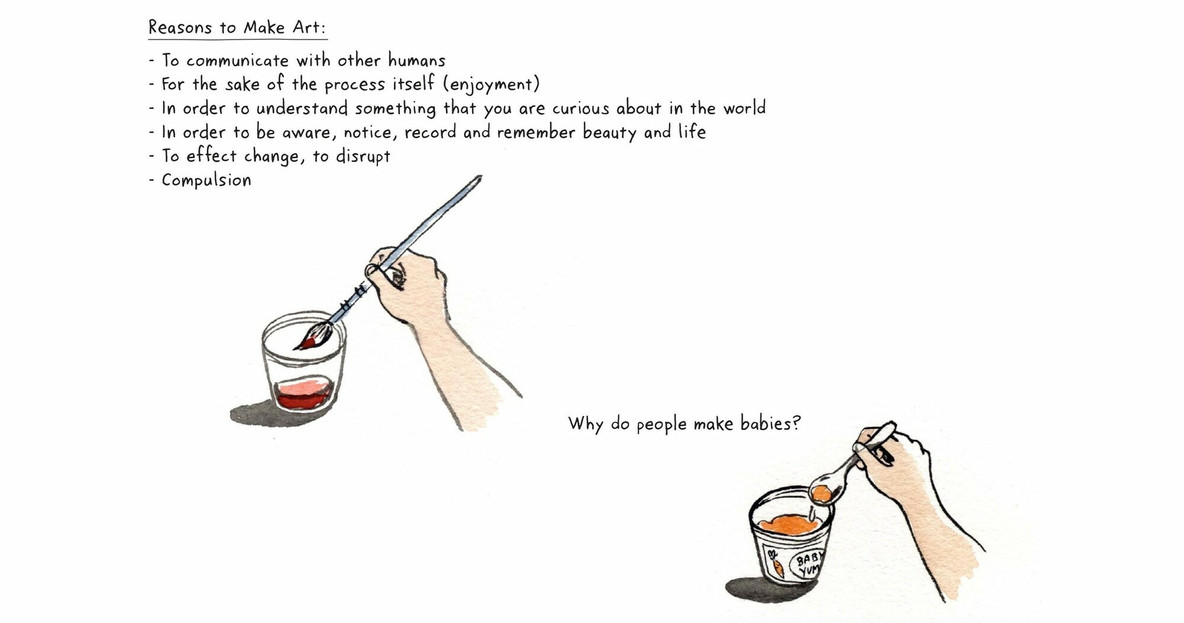
Illustration by Danica Novgorodoff for Drawn to MoMA
Resources for Learning and Making Comics
Inspiration is everywhere. As you embark on making comics, we invite you to read those made by others and to explore the wealth of resources created by teachers, scholars, writers, artists, and enthusiasts. You can mine these resources for ideas and tips, or you can use them as a way to figure out what you like and don’t like. Here are some of our favorite resources you can use on your own or bring into the classroom.
Resources for Teaching Comics from the Center for Cartoon Studies, which includes syllabi, study guides, handouts, and instructions for activities
Teaching Comics, resources available on the South Portland School Department’s Digital Learning Commons
Making Comics, an online repository of comic-making educational material
Graphic Novels and Comic Books Resources from The National Children’s Book and Literacy Alliance
Lynda Barry’s Making Comics, a book with advice, stories, and creative prompts by cartoonist and comics-studies professor Lynda Barry
Digital Comic Museum, an online archive of digitized public domain Golden Age comic books
Drawn to MoMA on MoMA Magazine
The Nib, a daily comics publication dedicated to journalism, essays, memoir, and satire
The Patron Saint of Superheroes, Chris Gavaler’s blog exploring different topics in comics
Scott McCloud’s Journal, the website of Scott McCloud, a comic book artist and the author of Understanding Comics
Comic Abstraction: Image-Breaking, Image-Making, a MoMA exhibition exploring the ways artists have adapted the elements of comic books to address social issues
Related articles
-
How to Make Comics: What Are the Elements of a Comic?
Dig into the details that make comics unique, and try your hand at some activities.
Chris Gavaler
Sep 16, 2021
-
How to Make Comics: What Are Comics?
Discover the unexpected similarities between comic books and the artworks in MoMA’s galleries.
Chris Gavaler
Sep 9, 2021

