
Oral History How To
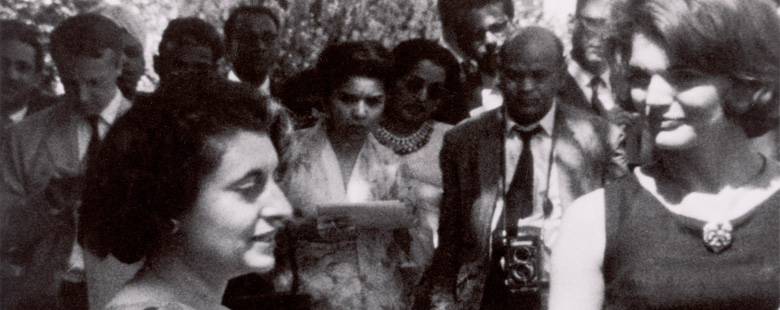
One important way to capture the often ephemeral history of museum education is to capture oral histories of teachers and those most directly involved. On June 26, 2011, Wendy Woon, Edward John Noble Deputy Director for Education at The MoMA, with a bit of guidance from colleague Jeanmarie Theobalds from The MoMA Archives Department, spoke with Arlette/Arles Buchman (b. 1917), a former student and teacher during the 1950s and 60s at The MoMA, and later at the Victor D’Amico Institute in Amagansett, New York. We encourage you to capture oral histories of museum educators and post them here. Jeanmarie put together a few tips and resources for doing oral histories that may be helpful.
Oral History Tips
Oral history is the work of relationships; in the first place, a relationship between the past and the present, an effort to establish, through memory and narrative, what the past means to the present; then a relationship between the interviewer and the interviewee…
Alessandro Portelli. “The Peculiarities of Oral History.” History Workshop Journal (1981) 12 (1):96-107.
Before you begin:
- Choose your equipment. Will you use audio or video? Transom.org is a wonderful site which reviews audio and video equipment used by both professionals and consumers.
- Write a brief project description to help define the scope of your project (is it a life narrative of an individual, a collection of individuals who witnessed an event, participated in an organization or lived in a particular region?). Check out OralHistory.org, Columbia, Baylor, and History Matters at George Mason University for some ideas.
- Identify the persons who would best meet the parameters of your project’s scope.
- Research the individual’s life and background in order to prepare for your interview (For example when Wendy Woon interviewed Arlette Buchman, former MoMA educator, The Museum of Modern Art Archives was searched for any relevant information about MoMA education.)
- Contact your subjects by writing a letter politely requesting an interview in which you explain: your project’s intentions, what you will do with the interview, how you will record the interview, how much time is required (a 3-4 hour window is a good place to start) and why you would like to interview this individual for this project.
- Once the individual has agreed to the interview and a date and time has been arranged, arrange a meeting if possible. This will help to establish a rapport as well as to answer any questions the interviewee has about your project and what will happen during the interview.
- If you are planning to publish the interview or portions of it, you should prepare a release of permission to use the interview. You should be very clear about what your intentions are and how you will use the interview.
- Before the interview, do a mock interview by interviewing a friend of family member to become comfortable with the interview process and with operating your equipment.
- Three to seven days before the interview, call and confirm the time and place of the interview.
- Prepare an interview checklist to make sure you have everything, like equipment, batteries, S.D. cards, directions, etc.
The interview:
- Choose a quiet room as far away as possible from ambient sounds like air conditioning, open windows, chiming clocks, air vents, or active fireplaces.
- Politely ask the interviewee to turn off his/her cell phone and any telephone ringers.
- Sit at a table. Some prefer to have the interviewee sit on a perpendicular side of the table rather than the parallel side to offset the feeling of an interrogation.
- Set up recorder (audio) between yourself and the interviewee. If you choose to use a “lapel mic,” keep in mind that though they are nicknamed “lapel mics,” for the best sound it is actually better to secure the mic in the middle of the chest slightly above the solar plexus on the shirt’s button placket or a gentleman’s tie. Be careful of scarves or other loose clothing that may rub across the mic and interfere with the recording. Check out this article for more info.
- Set up a video camera to either record both you and the interviewee or if you prefer, just the interviewee. Choose a spot where the interviewee is well lit either naturally or with lights you have set up.
- Before you start the interview do a quick 3 minute equipment test by asking the interviewee to describe what he/she had for breakfast, lunch, or dinner. Playback the test and listen with headphones to make sure “p’s” aren’t popping and “s’s” aren’t sizzling. Check out this article for more info. If you are using video, check the focus, the background for your personal items (like camera bag or jacket) and anything else you don’t want in the frame. Is the image too bright or too dark?
- Before you start, it’s nice to let the interviewee know that he/she is free to stop the interview at anytime to take a break or end the interview.
- Start the interview with: your name, date, location, and ask the interviewee introduce him/herself. For example: to say his/her name, when and where he/she was born. This is a nice way to start as it helps to contextualize the interview. Some people also like to follow up the initial when and where question with, “tell me a little something about yourself.” This can help put the interviewee at ease.
- Try to avoid yes or no questions. For example instead of asking “Did you teach art?” try “Tell me about the classes you taught?” Begin with broad questions that will invite the interviewee to discuss and explore his/her specific recollections and insights: “How would you structure your class?”
- It also can enrich the interview when you ask for someone to describe a person or place physically.
- Before closing the interview it’s nice to first ask: Is there anything else you would like to add or feel should be asked?
- When the interview has ended, it’s nice to close the interview by thanking the interviewee.
After the interview:
- Immediately send a thank you note to your interviewee. Though a stamp and envelope might seem outdated, it is still nice to get a handwritten note.
- Transcribe the interview. What is a transcript?
- Send the interviewee a copy of the transcript for him/her to review and/or edit.
- Once you have received the edited transcript, revise accordingly. You may find that interviewees will strike through a portion. Always honor their edits.
- Send the interviewee the final draft of the transcript and another release allowing you to use the transcript.
Additional links:
Telling Lives Oral History Curriculum Guide (by request)
List of Oral Histories and Films
Making Sense of Oral History Linda Shopes
I can Almost See the Lights of Home Alessandro Portelli
Bibliography:
Charlton, Thomas; Myers Lois; Sharpless, Rebecca Handbook of Oral History, Altamira Press, 2008
Grele, Ron J., Envelopes of Sound: The Art of Oral History, Praeger, 1991
Hamilton, Paula; Shopes, Linda, Oral History and Public Memories, Temple University Press, 2008
Perks, Robert; Thomson, Alistair, The Oral History Reader, Routledge, 2006
MacKay, Nancy, Curating Oral Histories: From Interview to Archives, Left Coast Press, 2006
Yow, Yvette Raleigh, Recording Oral History: A Guide for the Humanities and Social Sciences, 2nd edition, Altamira Press 2008